Summary
Set up VirtualText as an admin — control panel, teams, inboxes, users, and phone number configuration.
Here, you’ll find how to set up your VirtualText account as an administrator. Using the platform will be covered in the User Guides. You’ll learn here how to set up Users, Teams, and Inboxes.
Overview
Setting up your VirtualText platform as an admin has a few components that click together very well. Enjoy the build, and reach out to our team if you have any questions we can assist you with!
Control Panel Items
-
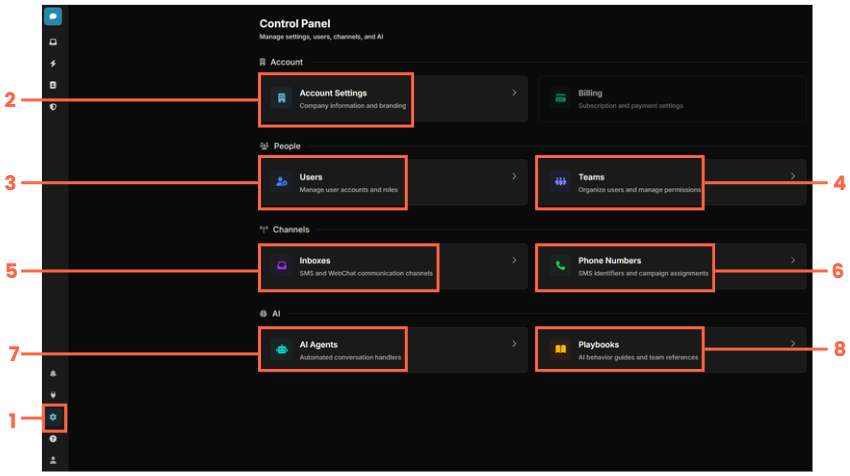
Here is where you’ll access this Control Panel to either set up, or adjust your platform
-
Account Settings - Set up basic information about your company
-
Users - Manage your Users
-
Teams - Manage the teams your users will belong to
-
Inboxes - Manage your SMS, Chat, and other inboxes
-
Phone Numbers - Review your phone numbers used for calling and texting
-
and 8. - AI Agents and AI Playbooks, covered in a separate guide.
Account Settings
-
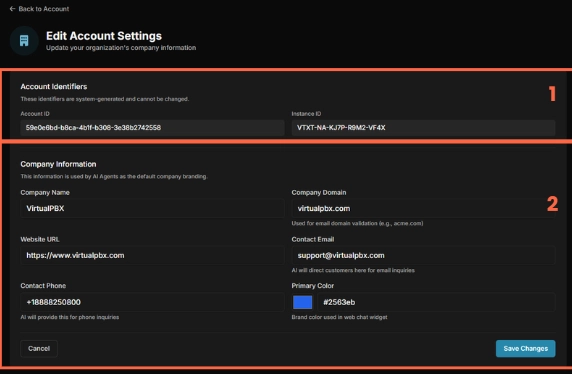
Account Identifiers - These are simply your account IDs and identifiers that may need to be used should you want to pursue automations and integrations
-
This is company information of yours. All of this is imported on signup with our platform.
Users
-
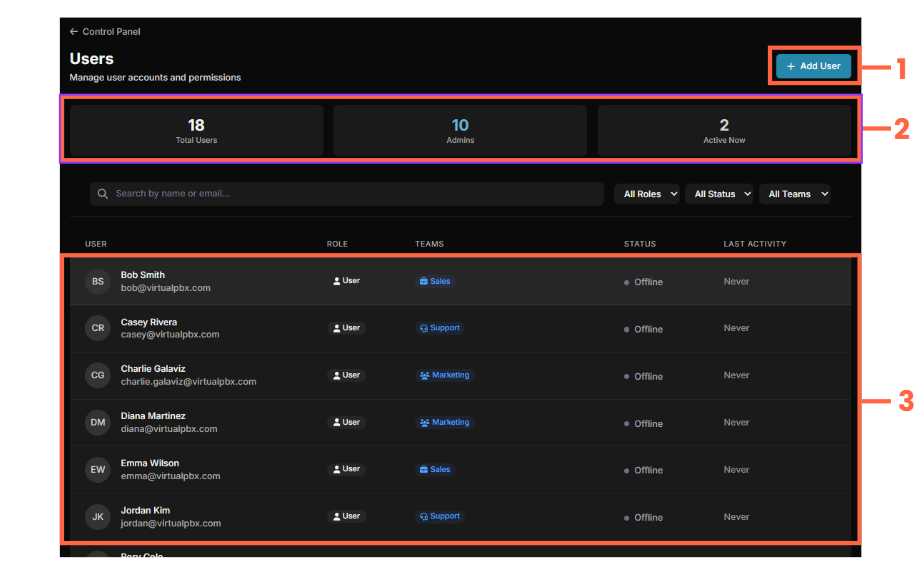
Add a user to your system
-
Review your user and admin counts
-
Your list of users - You can click a user to edit it; More information on the edit options below
Add A User
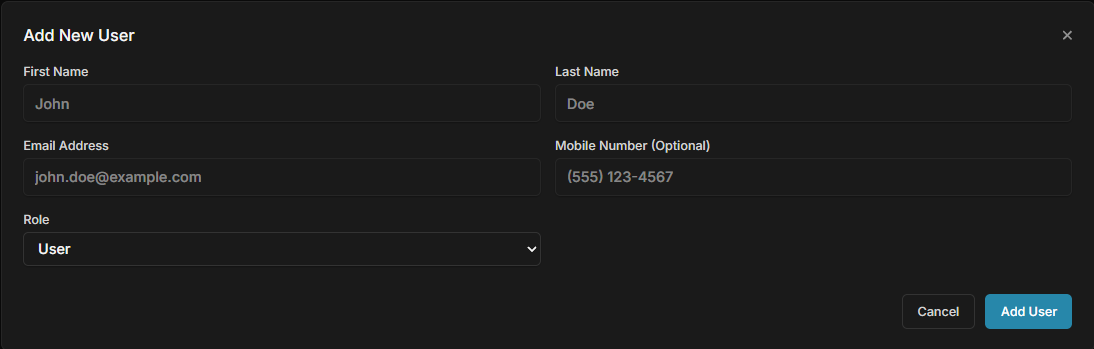
Here you can add a user with their basic information. You can add them to teams with the below menu
Edit Users - Assign to teams and other options
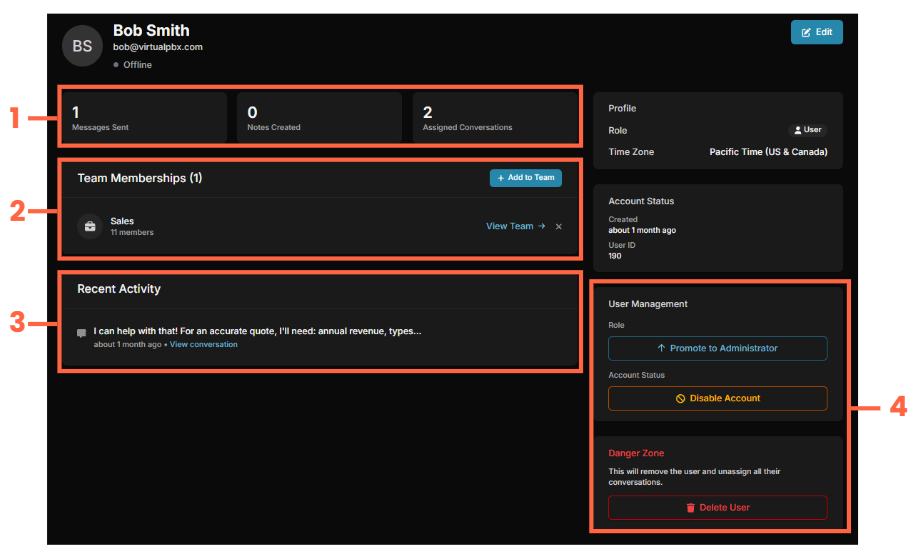
-
Review a user’s conversations and activity
-
Add a user to your team(s)
-
Review recent conversation history
-
Promote a user to an admin, disable their account, or delete the user
-
WARNING: Deleting a user will also unassign all of their conversations
Teams
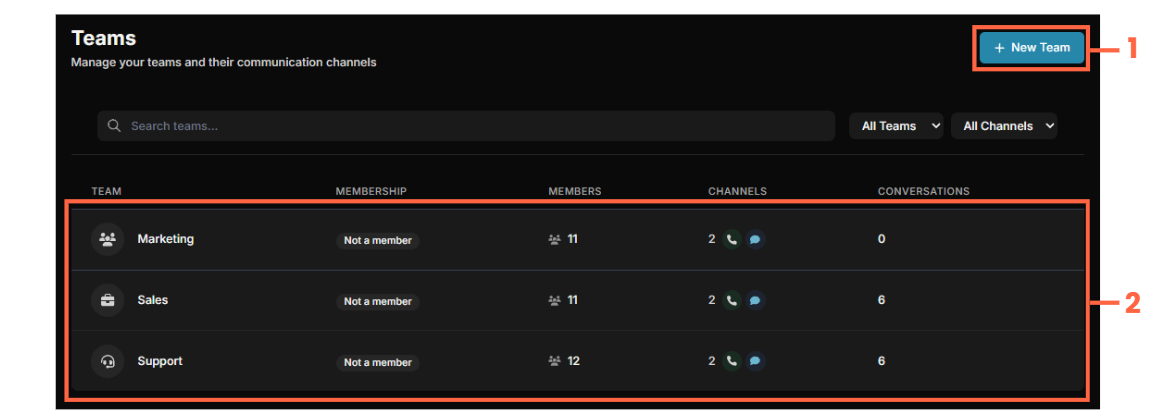
-
Begin creating a new team here
-
Click on a given team to edit it; More information on edit options below
Create a New Team
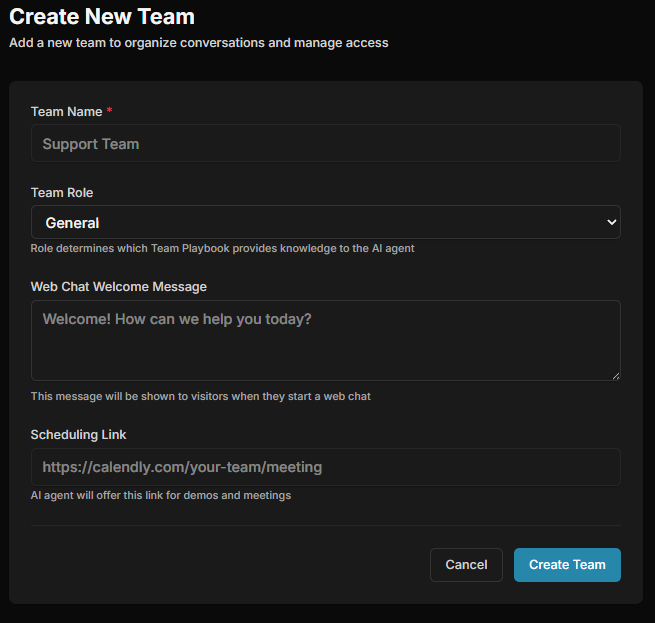
Fairly straightforward here - Fill out information as presented. One item to note is that if an AI assistant is assigned to this team, it will reference the scheduling link you list here when needed.
Editing a Team - Adding Members, Assigning Inboxes
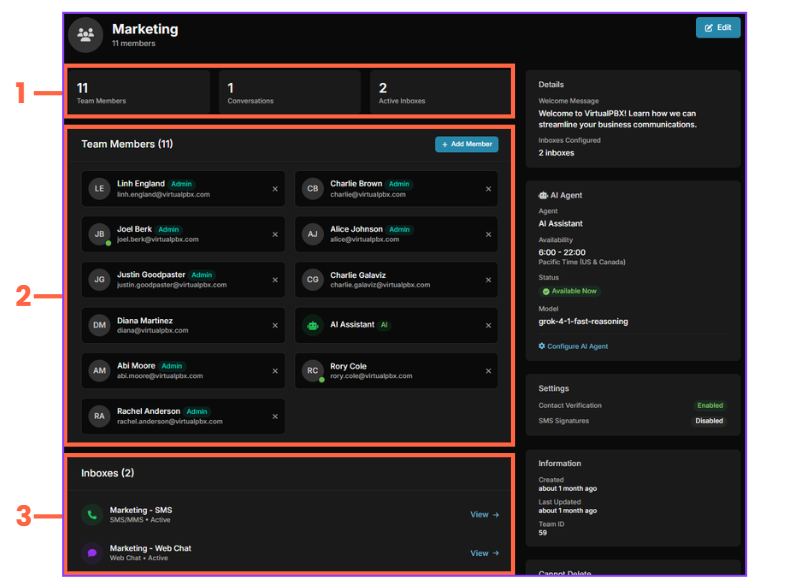
You can find this view by clicking on a teams in the Teams menu
-
Review the basic statistics for the team
-
Review the assigned users, and add more (AI Agents included)
-
Review the Inboxes assigned to this team
Inboxes
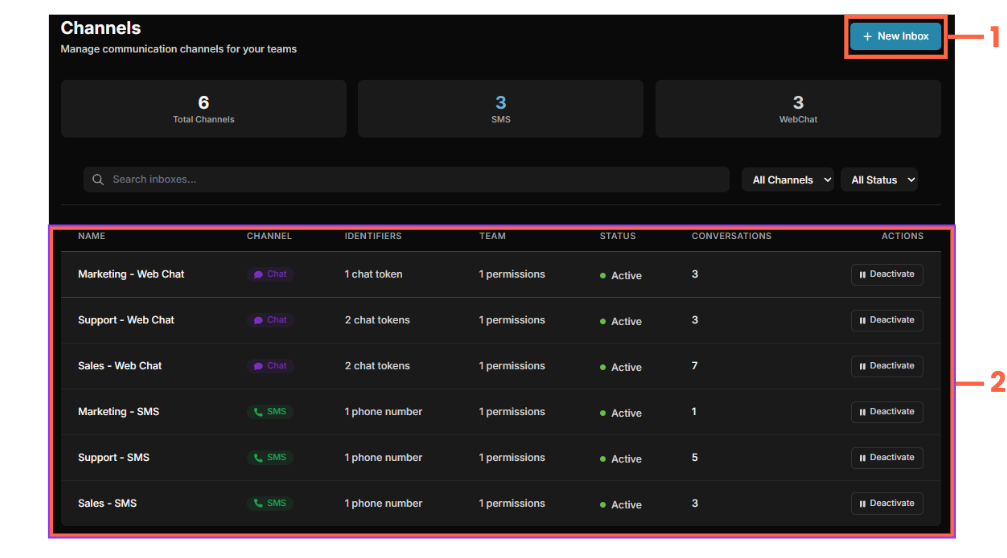
-
Here, you can create a new inbox
-
Your list of inboxes. You can click on an inbox to edit it, more info on that below
Adding a New Inbox
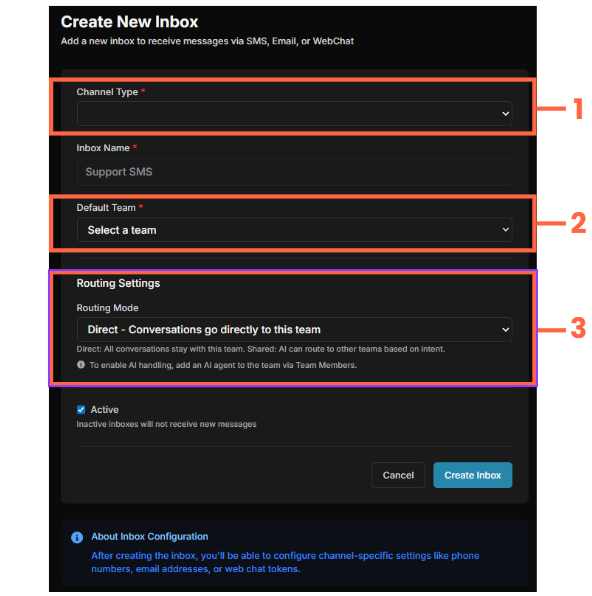
-
Select your channel type - Webchat or SMS
-
Please note that selecting webchat will give you two additional options - Brand Color (Which is automatically pulled from your Account Settings level, but can be changed) and Welcome Message.
-
Select the default team to assign to this inbox
-
You have two options for Routing Mode
-
Direct - Conversations are automatically assigned to this team
-
Shared - AI Assigns to this team when applicable
Editing an Inbox - WebChat
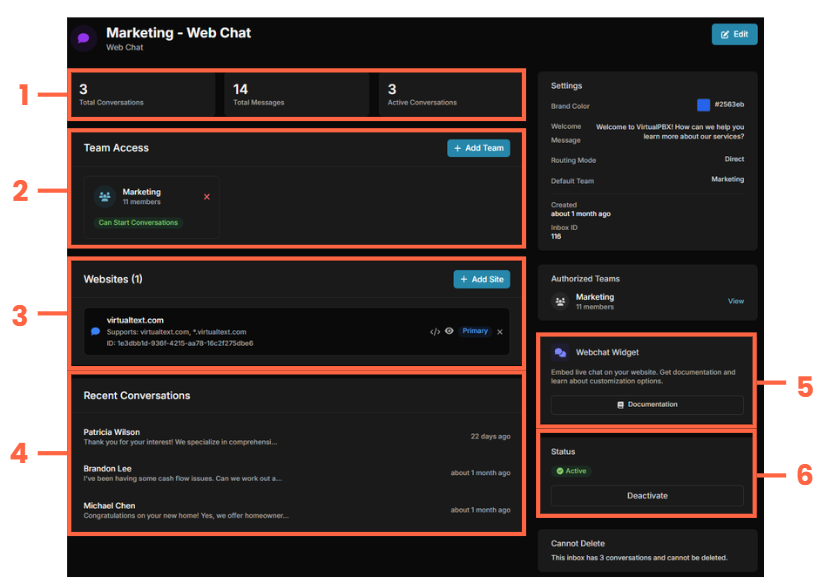
-
Review the basic statistics for this Inbox
-
Add Teams to this Inbox
-
This is the code that is used when generating a chat widget for your weebsite
-
View recent conversations assigned to this inbox
-
Review the Documentation to configure the Webchat widget
-
Deactivate the Inbox
Editing an Inbox - SMS & MMS
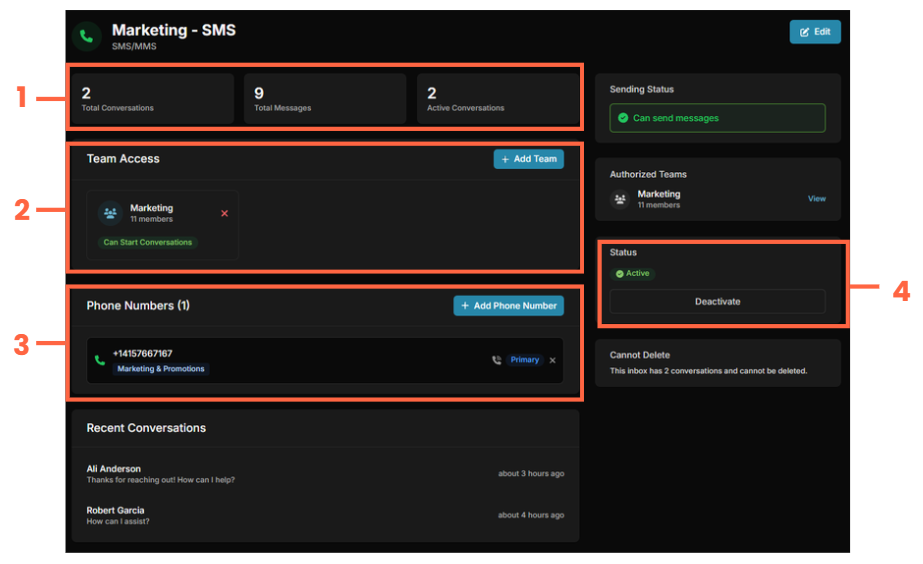
-
Review the basic statistics for this Inbox
-
Add Teams to this Inbox
-
Assign Phone Numbers to this Inbox
-
Deactivate the Inbox
Phone Numbers
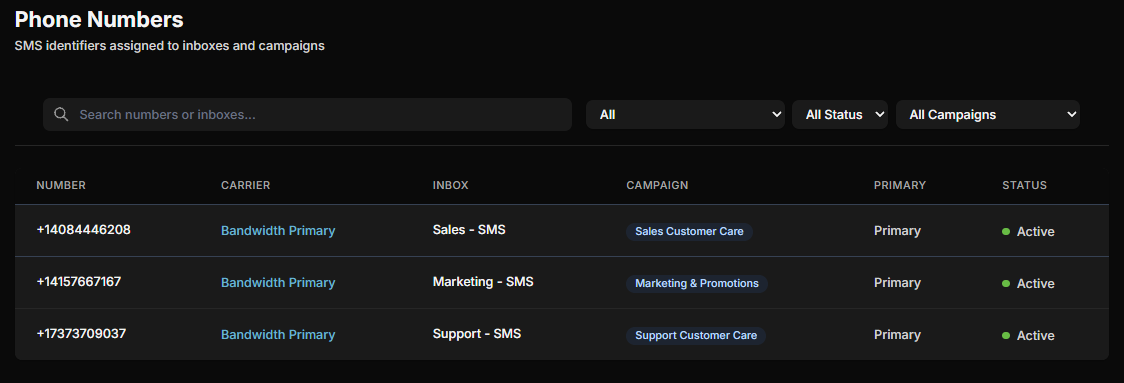
At this time, this menu is simply a reference page. It shows you your phone numbers, and which inboxes they are assigned to. Please note that to assign a number to an inbox, you do so through editing the Inbox itself
New to VirtualText?
Try it free before you commit.
Start a Connect trial with SMS or webchat, a shared inbox, and AI. Webchat trials do not require a credit card.
Still need help?
Our support team is available Monday–Friday, 6 AM – 6 PM PST.